Have some friends in town from Europe for the year and wanted their kids to feel at home so I created some signs for their bedroom. I need to get a picture of the Isabel’s finished product as she added some seashells that really made this one pop!
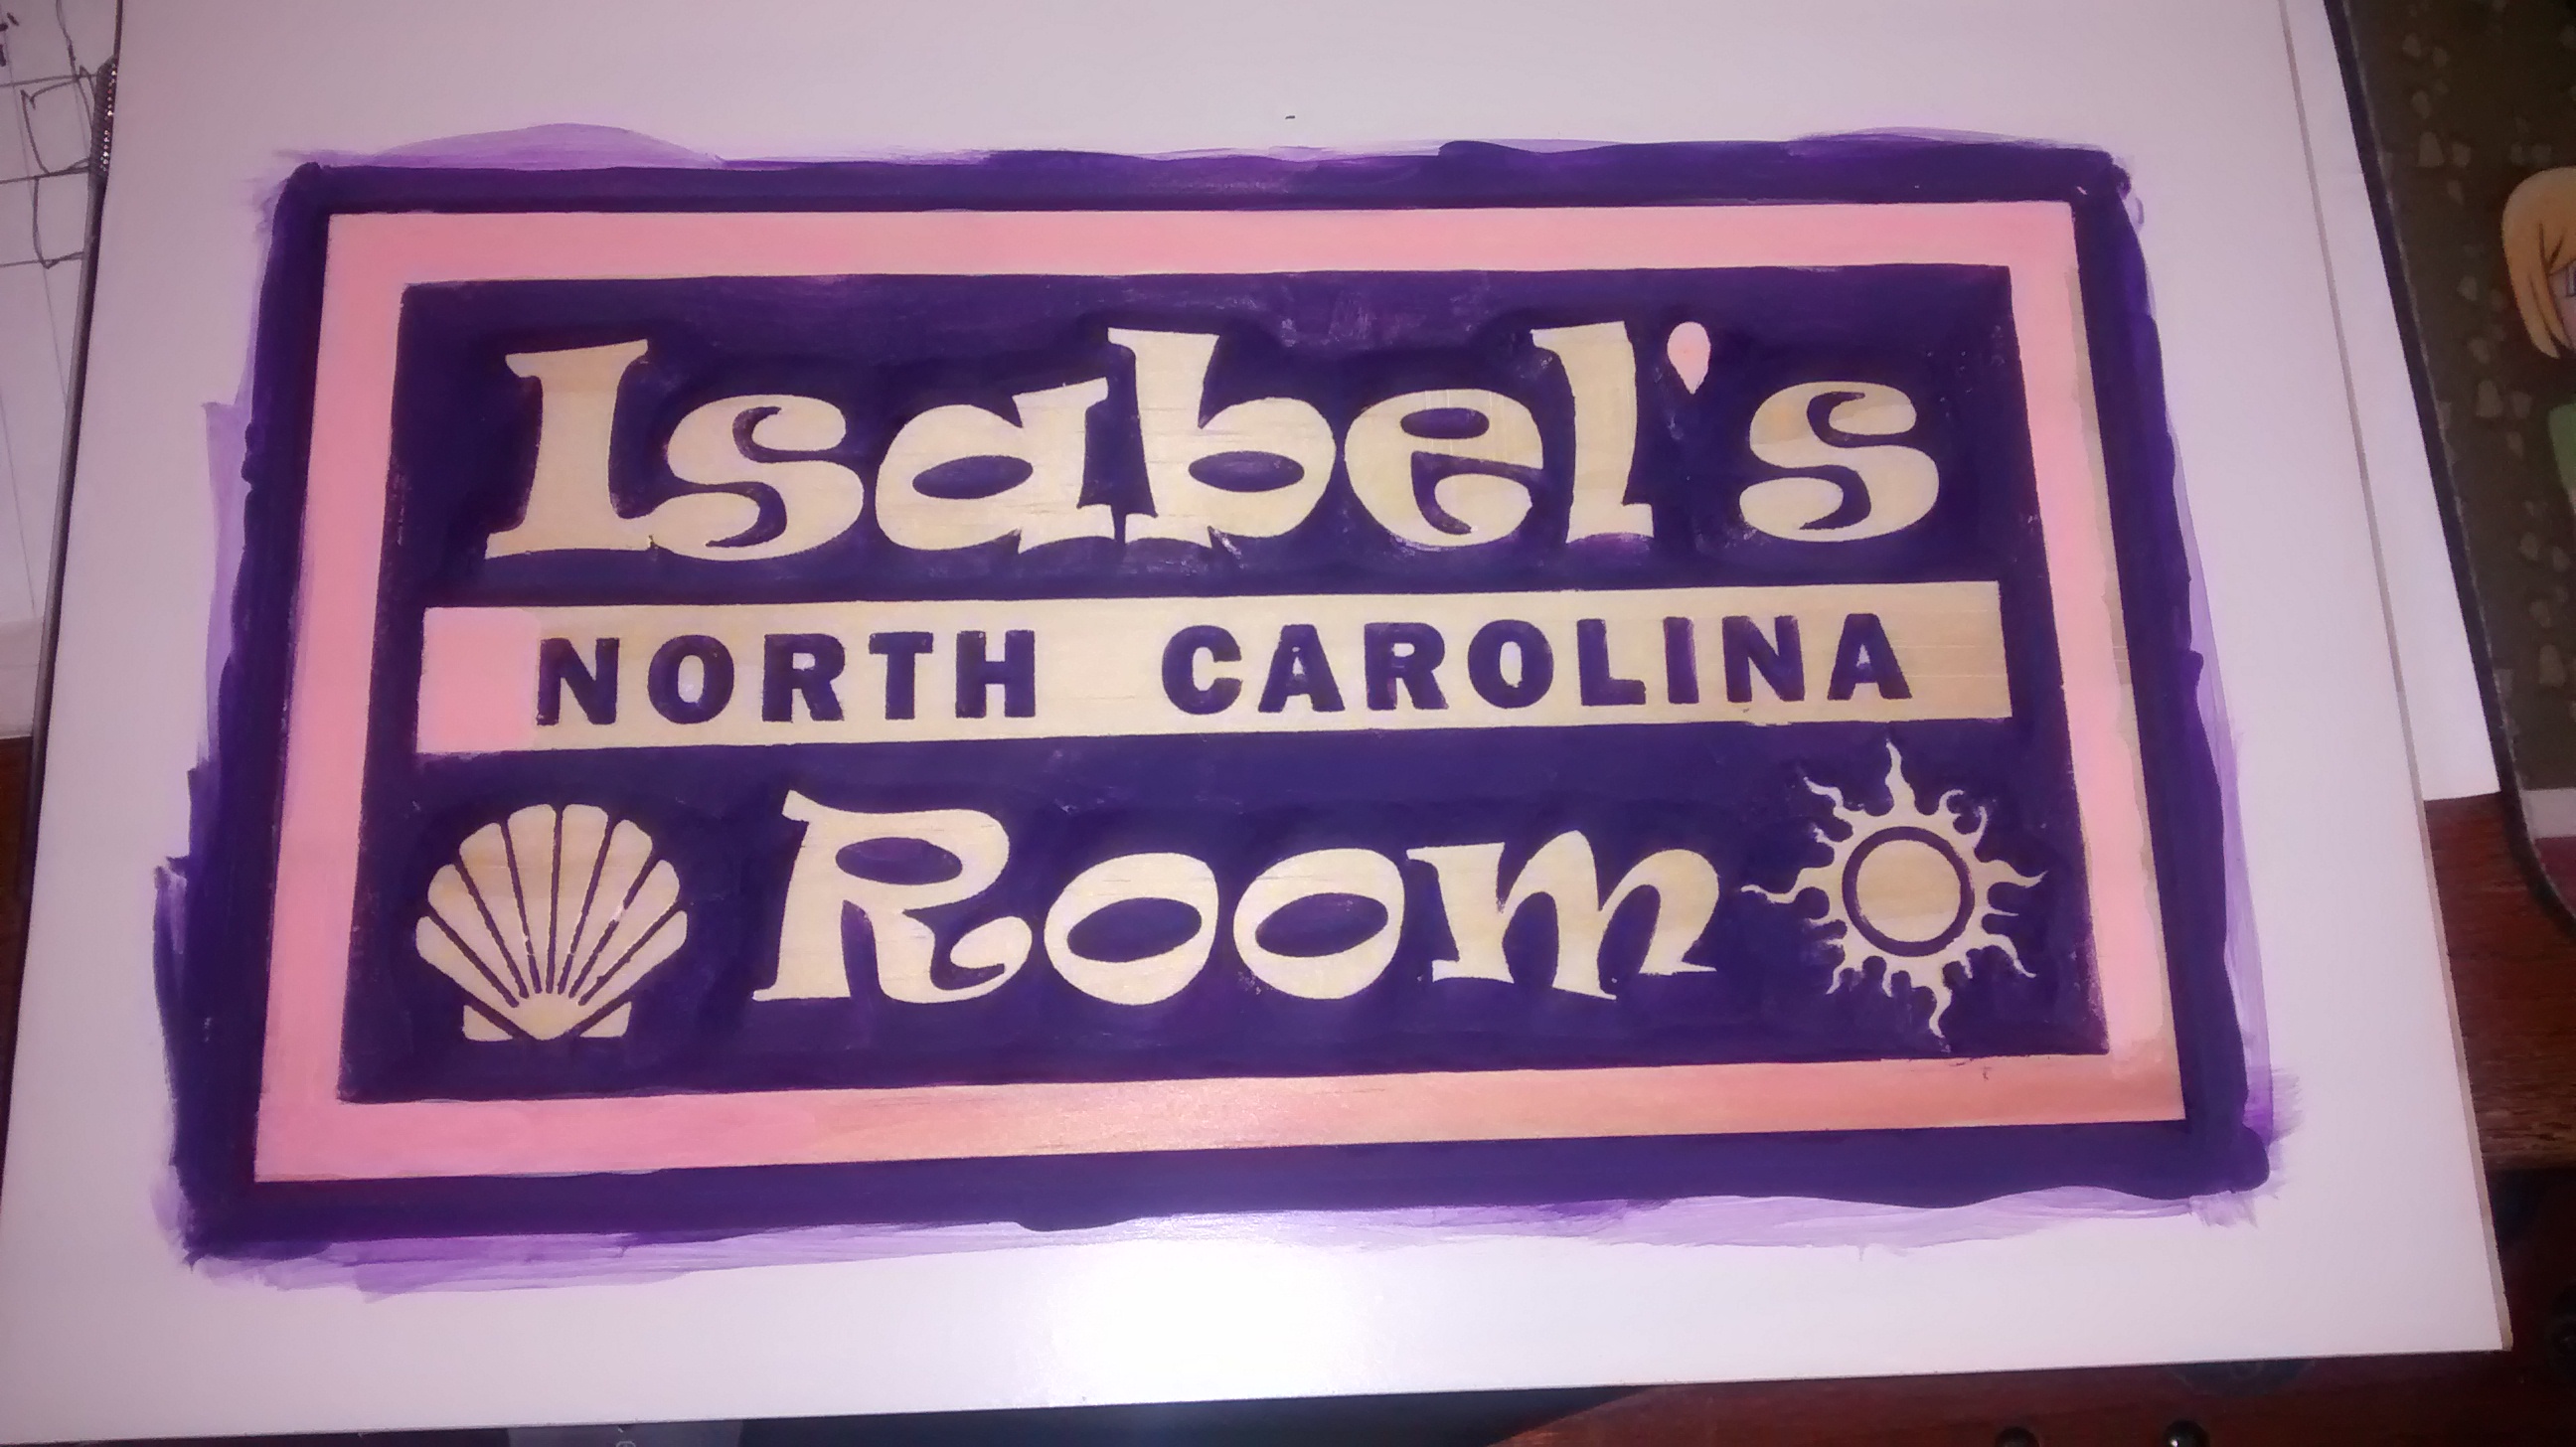


Have some friends in town from Europe for the year and wanted their kids to feel at home so I created some signs for their bedroom. I need to get a picture of the Isabel’s finished product as she added some seashells that really made this one pop!
I finally etched my first board! I bought my first 2 layer copper clad and some peel-n-stick traces more than 20 years ago. They’ve been sitting in my projects box since then. So it’s about time to try it out. It was not without some problems but I’m real happy with the way it came out. I used a laser to burn the design into copper clad covered in flat black paint. And used a Hydrogen Peroxide(2 parts)/Muriatic Acid(1 part) solution for the etch. It took about 10 minutes with some gentle rubbing to finish the etch and about 2 days to learn Eagle CAD and design a board.
Now off to find those drill bits I bought last year…

1st Attempt (above) was destroyed with a large guillotine paper cutter. You tube made it look so easy. The 2nd Attempt (below) turned out much better by scoring the copper on both sides and snapping it loose. Also changed the layout with thicker traces just to be sure.

Half the second board was ruined when the razor slipped into the copper on one side. I could probably have masked it off and repainted since this was before the etch, but I wanted to get this thing rolling.
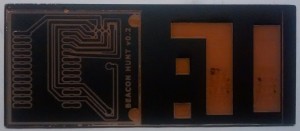
I noticed that areas where the paint was not entirely burned away still etched very well, the paint came off where the laser had heated it but not anywhere else.
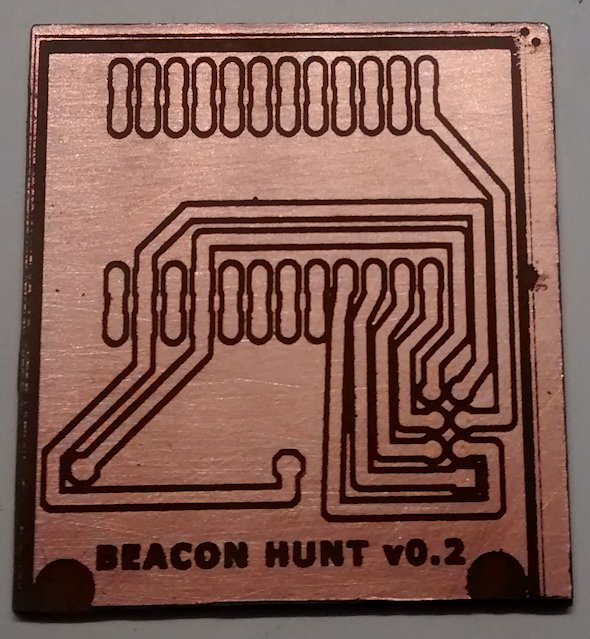
2nd attempt is a success!
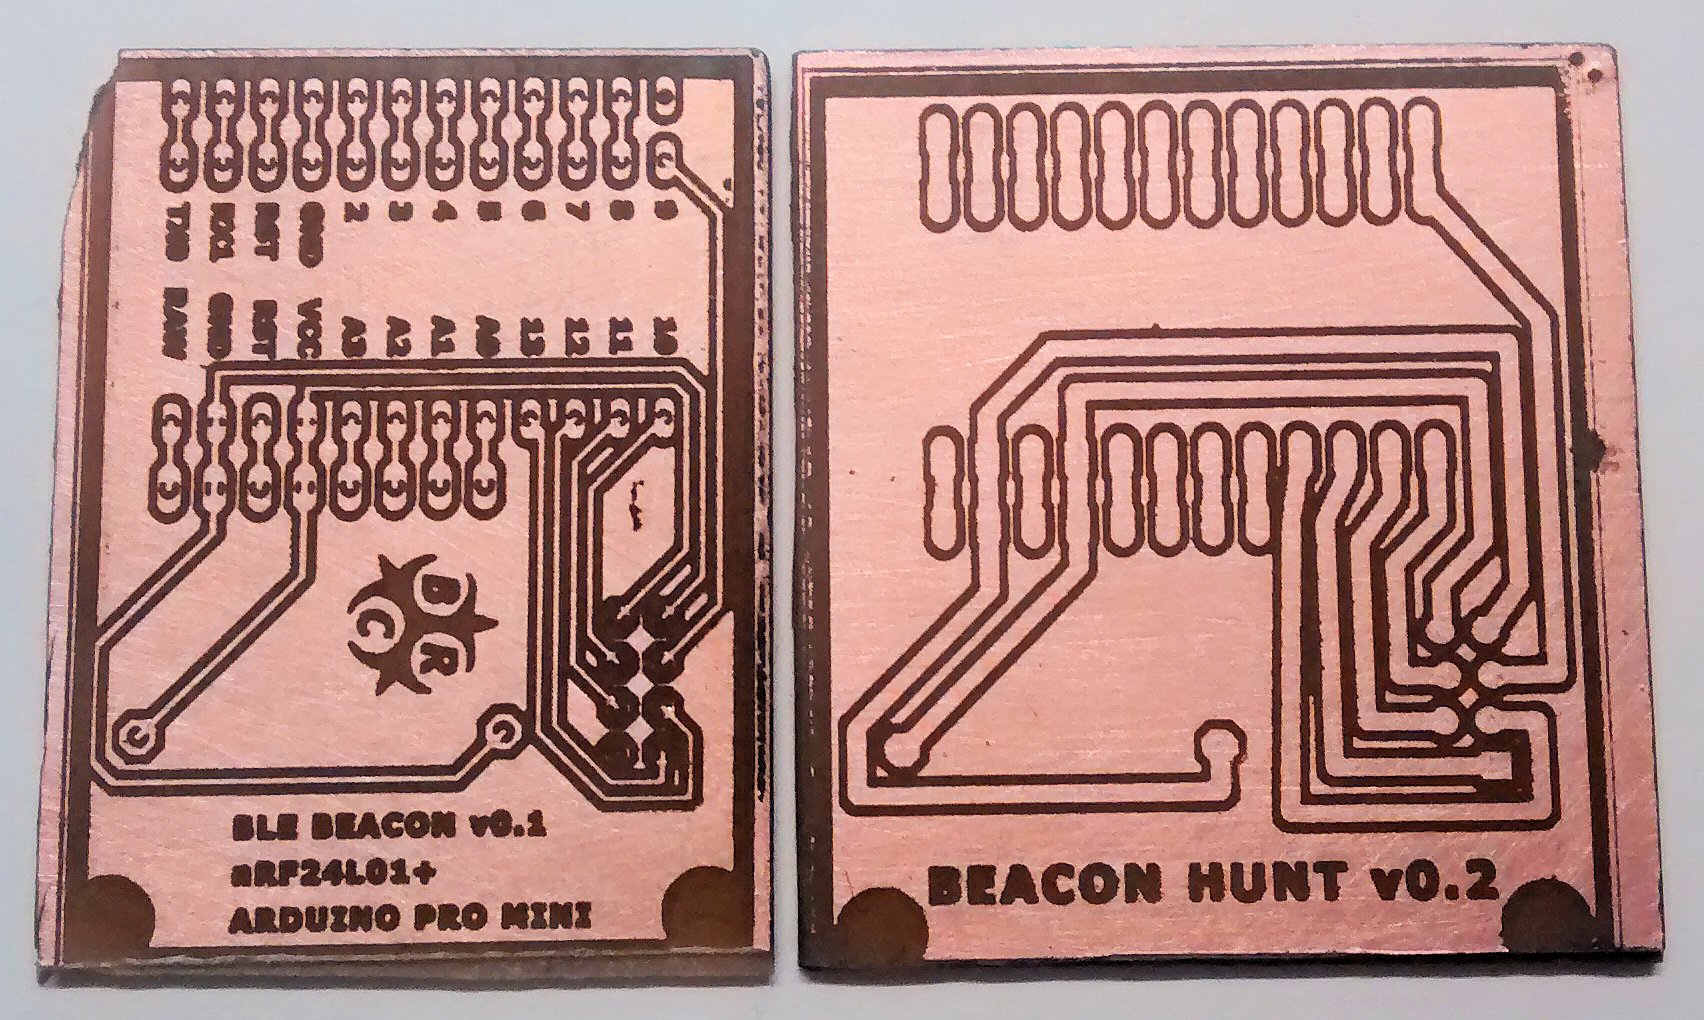
I went back and etched the board I thought was ruined. Turns out half was in decent shape and etched really well. Problem is there are no pads left on the right side due to using the wrong template.
Took some time while waiting for the additional extrusions to arrive making a control plate for the I2C panel and power switch. The LCD, SD and encoder are currently being used on my Solidoodle so I’ll switch everything over toward the end. Wow, this is going to look much better than the 3d Printed housing and give me a power switch that the Solidoodle was lacking.
![IMG_20140415_214024766[1]](http://hobbies.boguerat.com/wp-content/uploads/2014/04/IMG_20140415_2140247661.jpg)
The plate was made from some black on white acrylic from Inventables. The graphics were put together in Corel Draw and cut on my 40W Laser. I put 5mm holes around the edge that will act as a mount and to stabilize the H-frame.
I needed a coffee table to replace the kids Train Playset table so I set out to use my new Rasperry Pi and create a nice piece for the entertainment room.
Check out the new page that shows how it was constructed.

In an effort to finish out the man cave, I’ve been working on a coffee table to match the chess end table.
Since I had the weekend freed up for using the engraver but am now stuck in a holding pattern, I took the time to install a drawer that allows me to access the back of the machine. I also crafted a cover out of some scrap vinyl to protect it from my other garage activities. This shelf is 5 feet from a cat door I’ll use for the exhaust duct. I have a single-car garage and a full workbench so space is at a premium. 
I’ll start working on the coolant setup so that I’m ready for the new tube.
Again, all this was packaged in layers of bubble wrap in a padded box. Everything checked out good. The adapter for the main power cord (not shown) is not grounded so I dug out a regular PSU cord. And the cheap, plastic duct (not shown) will be replaced something more sturdy. The software installed without a problem but the dongle is an annoying security feature. 
Will hook everything up and give it a go after the laser tube is replaced. Happy LoveShopping responded to my e-mail with a promise to replace the tube.
Received the new Laser cutter today from e-bay seller – Happy LoveShopping.

Great packaging! Unboxing the machine took a while as it was double-boxed and bound in about 10 layers of bubble wrap.

The electronics compartment looked good, no obvious damage. The engraving compartment was looked good with the XY-axis secured with red ribbon. Neither cover was secured like the rear, with one screw holding it closed.


After removing the screw and opening the laser compartment, I found that the tube had damage on the output side. Where the coolant tube attaches, the glass nipple had broken off. I’ve seen this on another website but the tube was replaced without too much hassle, guess I’ll see if their service after the sale lives up to their reputation. I can’t imagine how they could have packaged this better except to have shipped the tube separately.

The second box was delayed and should arrive tomorrow…